How to Setup and Upload to Testflight
This browser is no longer supported.
Upgrade to Microsoft Edge to take advantage of the latest features, security updates, and technical back up.
Using TestFlight to Distribute Xamarin.iOS Apps
TestFlight is at present endemic by Apple tree, and is the principal mode to beta exam your Xamarin.iOS apps. This article volition guide you through all steps of the TestFlight Process – from uploading your app, to working with iTunes Connect.
Beta testing is an integral role of the software development cycle, and there are many cross-platform applications offering to streamline this process such equally HockeyApp, Applause, and of grade Google Play'south Native App Beta Testing for Android apps. This certificate focuses on Apple'southward TestFlight.
TestFlight is Apple's beta testing service for iOS apps, and is accessible only through iTunes Connect. It is currently available for iOS 8.0 apps and higher up. TestFlight allows for beta testing with both internal and external users, and due to a Beta app review for the latter, ensures a much easier process in your final review when publishing to the App Shop.
Previously, the binary was generated within Visual Studio for Mac and uploaded to the TestFlightApp website for distribution to testers. With the new process there are a number of improvements that volition allow yous to accept high quality, well tested apps in the App Store. For example:
- The Beta App review needed for external testing ensures a higher gamble of success for your final App Shop Review, as both require adherence to Apple tree's guidelines.
- Prior to uploading, the app needs to be registered with iTunes Connect. This ensures that there will be no mismatch between provisioning profiles, names and certificates.
- The TestFlight app is now a real iOS app, so it operates more rapidly.
- One time beta testing is complete, the procedure to move the app to review is quick and efficient; just one button click.
Requirements
Merely apps that are iOS 8.0 or above tin can exist tested through TestFlight.
All testers must test the app on, at least, an iOS eight device. However, best do dictates that your app should be tested on all iOS versions
Provisioning
To test your builds with TestFlight, you will need to create an App Store distribution contour with the new beta entitlement. This entitlement allows beta testing through TestFlight, and whatever new App Shop distribution profile automatically contains this entitlement. Y'all can follow the footstep-by-stride instructions in the Creating a Distribution Profile guide to generate a new profile.
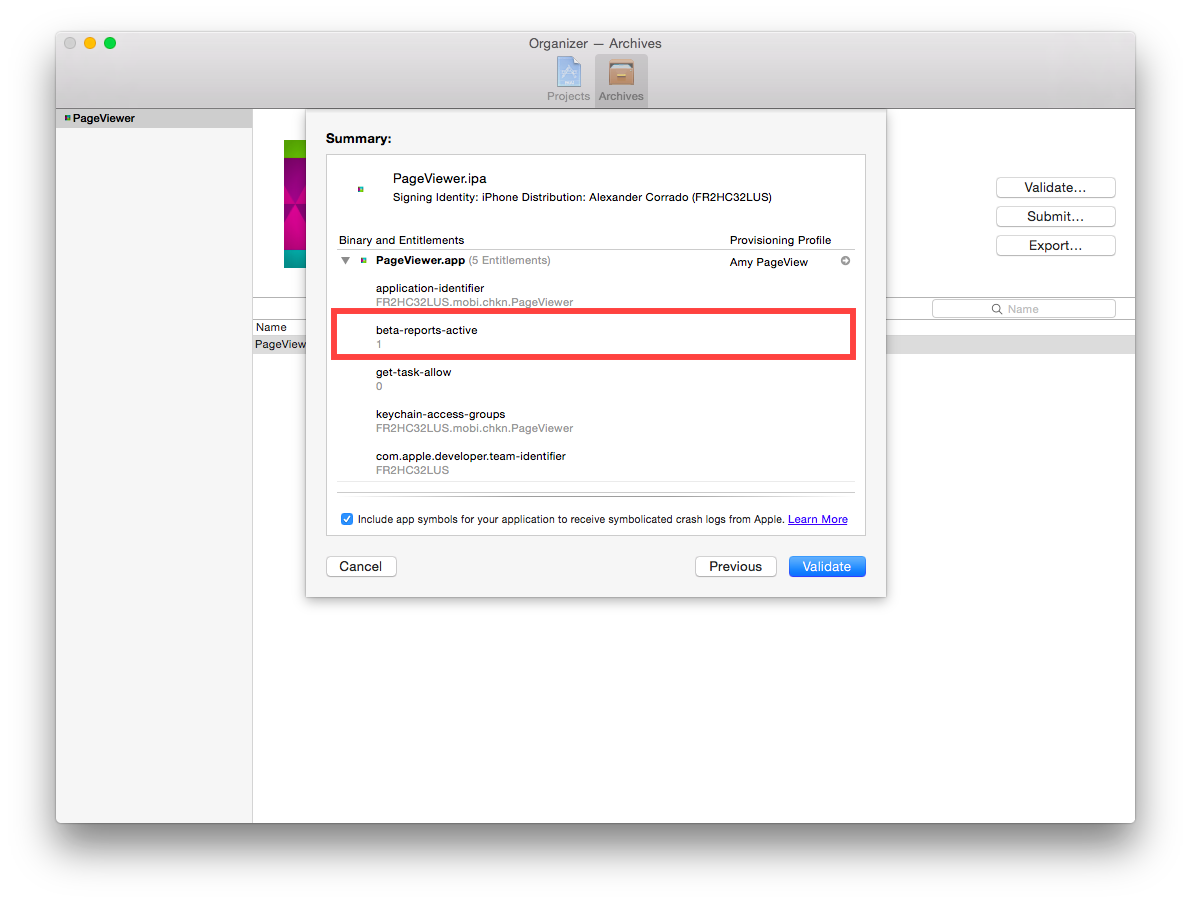
You tin confirm that your distribution profile contains the beta entitlement when validating your build in Xcode, as illustrated below:
- Open up XCode on the Mac build host after archiving the app
- Select the Window > Organizer carte du jour
- Select Archives on the left
- Select the Archive you desire to validate and click the Validate push button
TestFlight Workflow
The following workflow describes the steps needed to first using TestFlight for Beta testing of your app:
- For new apps, create an iTunes Connect tape.
- Annal and Publish your application to iTunes Connect.
- Manage Beta Testing:
- Add Metadata.
- Add Internal Users:
- Max 100 users, each user tin can test on up to 30 devices.
- Add External Users:
- Max 10000 users.
- Requires a beta examination review, which requires compliance with Apple'south guidelines.
- Receive Feedback from users, act upon it, and return to pace 2.
Create an iTunes Connect record
-
Login to the iTunes Connect Portal using your Apple programmer credentials.
-
Select My Apps:
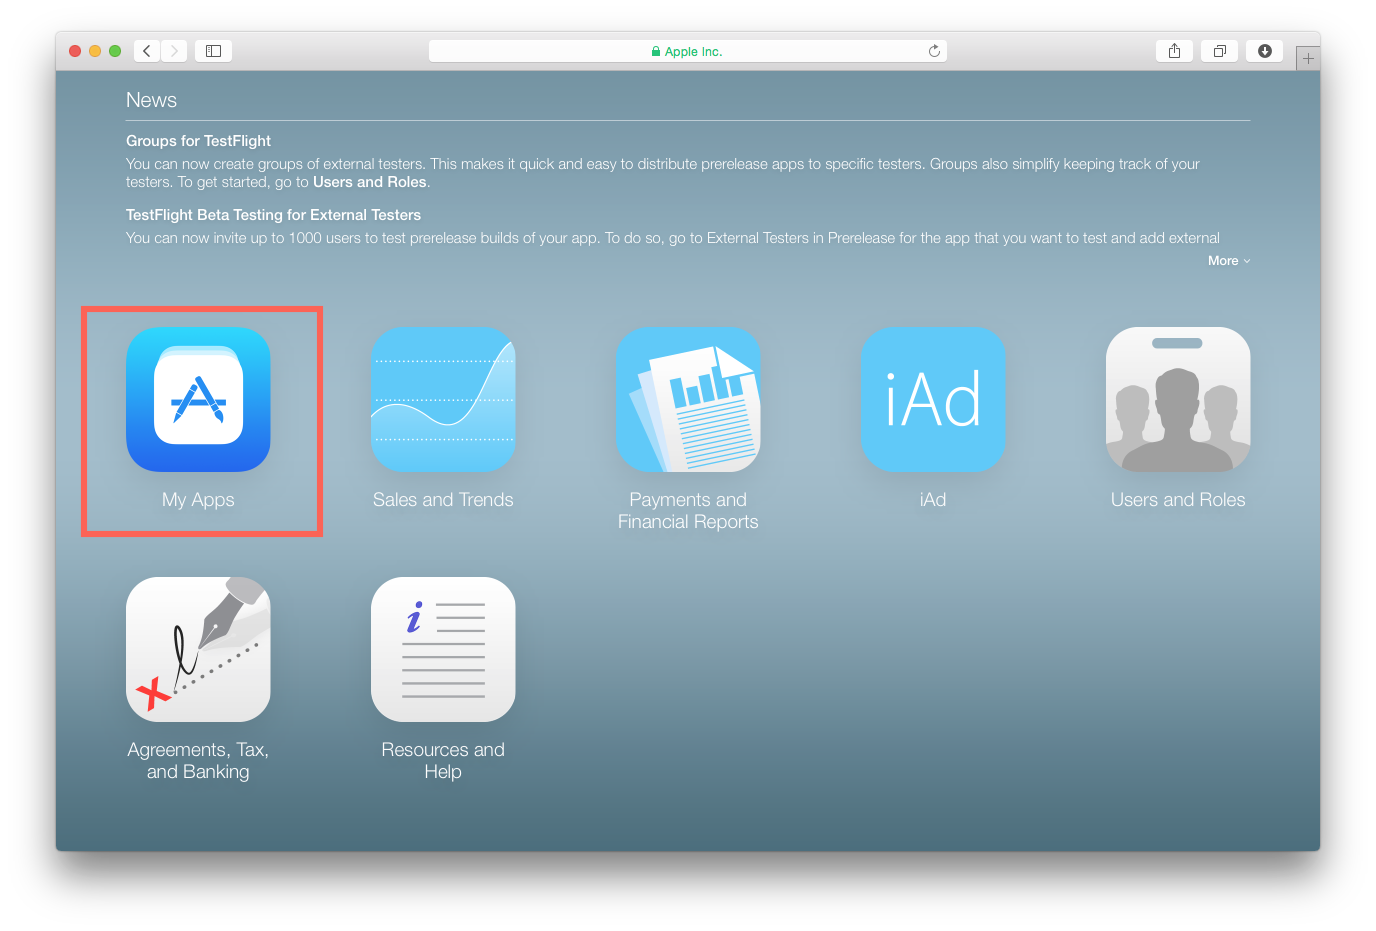
-
On the My Apps screen, click on the + push at the top-left corner of the screen to add a new app. If you have Mac and iOS developer accounts, you will be prompted to choose the new app type here.
You volition exist presented with the New iOS App submission window, which needs to contain exactly the same information as your app's Info.plist
For more data on creating a new iTunes Connect record, refer to the Creating an iTunes Connect Record guide.
Completing the New iOS App Submission form
The form should reflect exactly the information in your app's Info.plist file, as illustrated below:
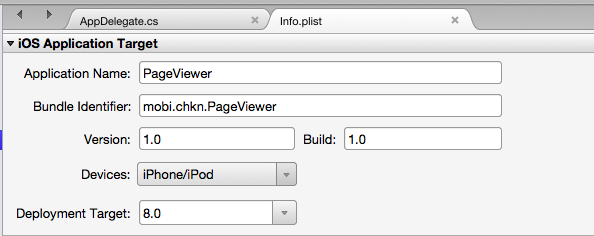
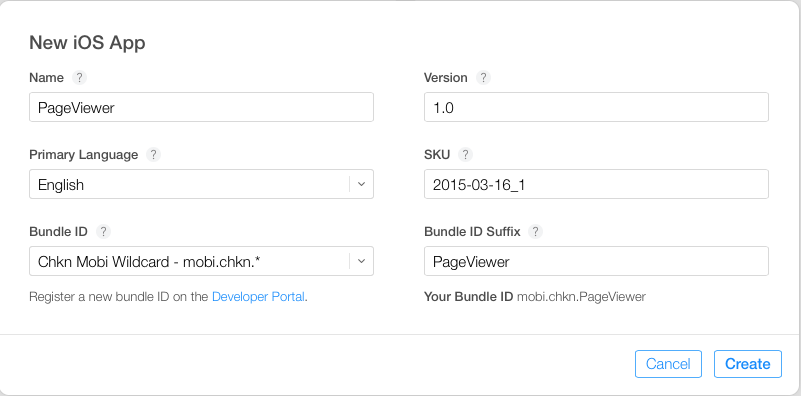
- Proper noun — The descriptive name used when setting up the App Bundle. This must be an exact friction match to the Application name entry in your
Info.plist. - Primary Language — The base linguistic communication used within the app. This is ordinarily whatever language you speak.
- Bundle ID — A drop down card listing all the App IDs created on your developer business relationship.
- Bundle ID Suffix — If you have selected a wild card Parcel ID (i.e. ending with a *, as in our case above), an boosted box volition appear, prompting for the Bundle ID suffix. In the example the Bundle ID is
mobi.chkn.*, the Suffix is PageView. Together these make up the Parcel Identifier in ourInfo.plist.
- Bundle ID Suffix — If you have selected a wild card Parcel ID (i.e. ending with a *, as in our case above), an boosted box volition appear, prompting for the Bundle ID suffix. In the example the Bundle ID is
- Version — The Version number of the app existence uploaded. This is chosen past the developer.
- SKU — The SKU is a unique ID for your app, that will not exist seen by users. It tin be thought of in a similar way as a product ID. In the example above I have chosen the date along with a version number for that date.
Upload your App
Once the iTunes Connect record has been created, you will exist able to upload new builds. Remember that builds must have the new beta entitlement.
First, build your terminal distributable in the IDE, and so submit your app to Apple tree through either the Application Loader, or the archive function in Xcode.
- Visual Studio for Mac
- Visual Studio
Create an Archive
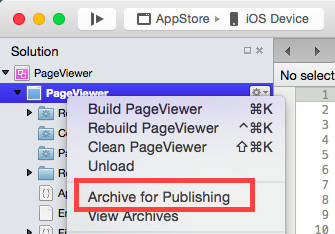
To build a binary in Visual Studio for Mac, you will demand to apply the Archive part. Right-Click on the project, and select Annal for Publishing, every bit illustrated below:
Refer to the Edifice the Distributable guide for more information.
Sign and Distribute your App
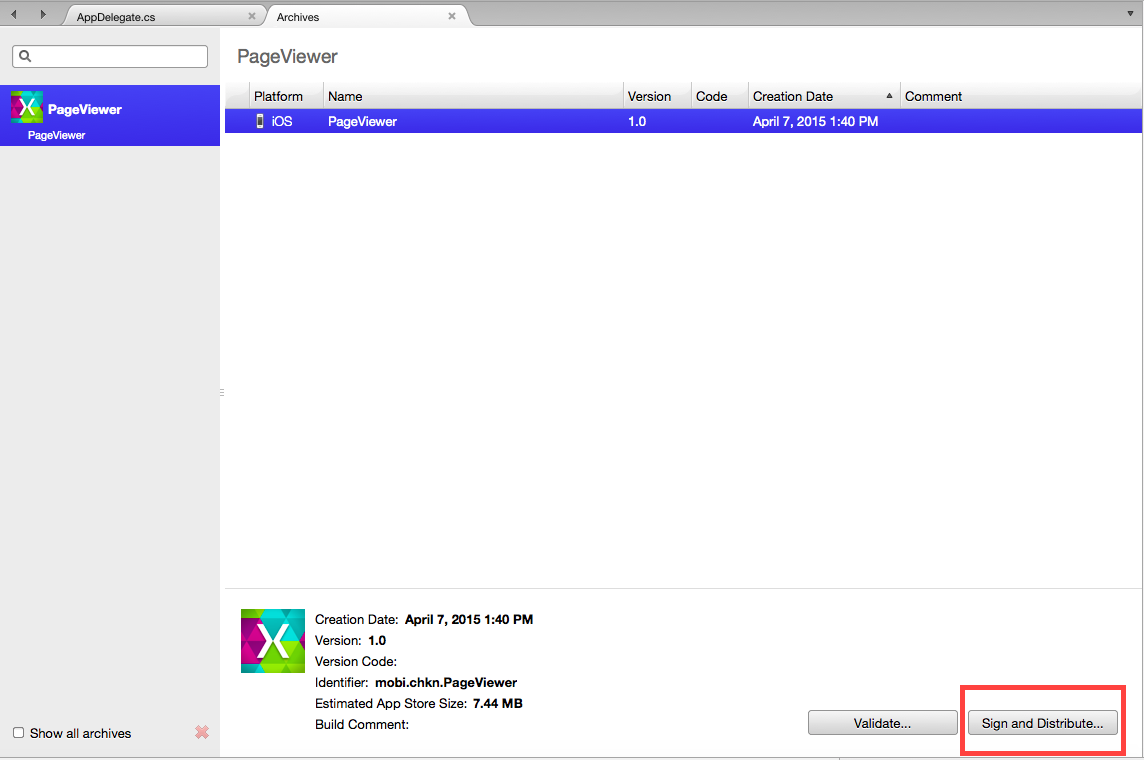
Creating an archive will automatically open the Archives View, displaying all archived projects, grouped by solution. To sign your app and prepare it for distribution, select the Sign and Distribute..., shown beneath:
This will open the publishing magician. Select the App Shop distribution aqueduct to create a package, and open Awarding Loader. On the Provisioning Profile screen, select your signing identity and provisioning profile, or re-sign with another identity. Verify the details of your packet, and click Publish to salvage your .ipa
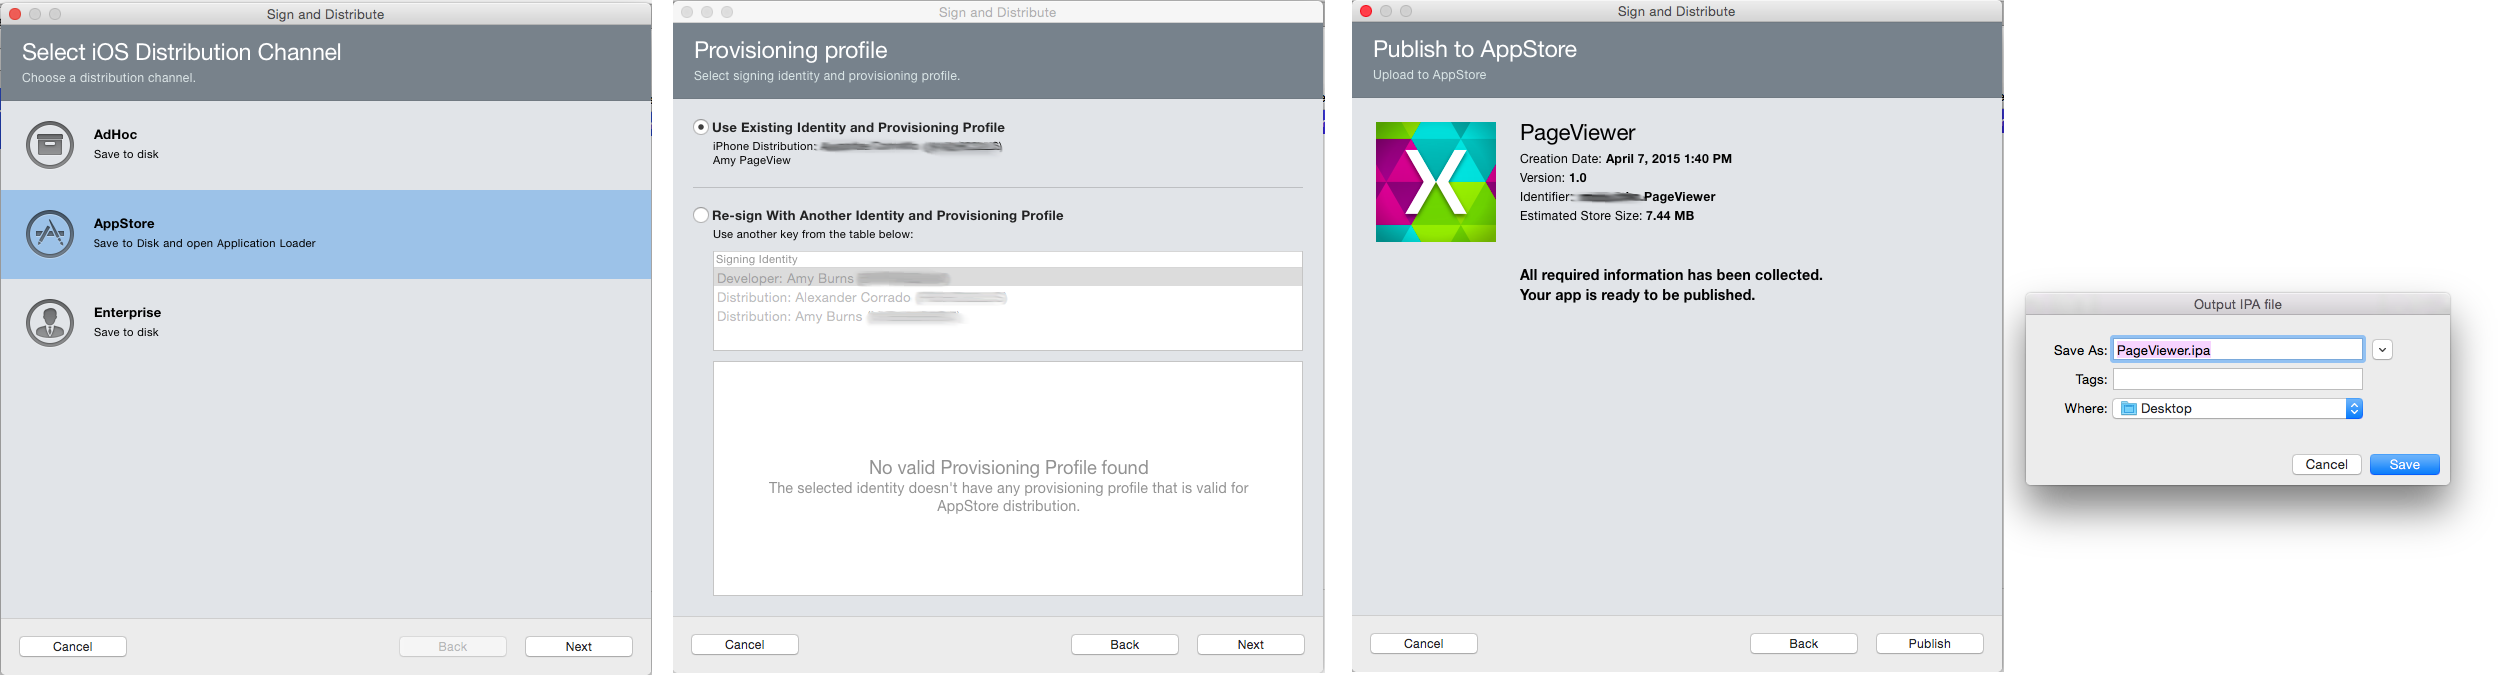
Refer to the Submitting your App to Apple section for more information on these steps.
Submitting your Build
The publishing wizard will open up the Awarding Loader program to all you lot to upload your build to iTunes Connect. Select the Deliver Your App choice, and upload the .ipa file created higher up. The Awarding Loader will validate and upload your build to iTunes Connect.
Refer to the Submitting your App to Apple section for more data on these steps.
The Publishing to the App Store guide describes all of the above steps in more detail, refer to this for a more in-depth expect into the App Store submission process.
Upon returning to the My Apps section of iTunes Connect, you should find that your application has been uploaded successfully. At this indicate you are now gear up to practice some Beta Testing!
Manage Beta Testing
Add Metadata
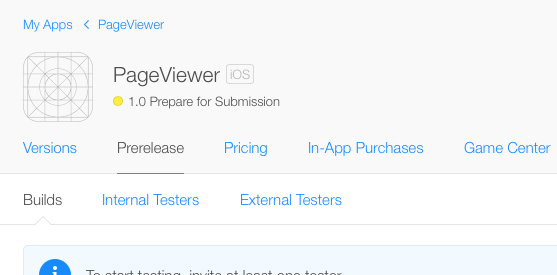
To start using TestFlight, scan to the Prerelease tab of your app. You should see three tabs showing a listing of Builds, Internal Testers, and External Testers, equally illustrated below:
To add metadata to your app, click on the build number, and so TestFlight:
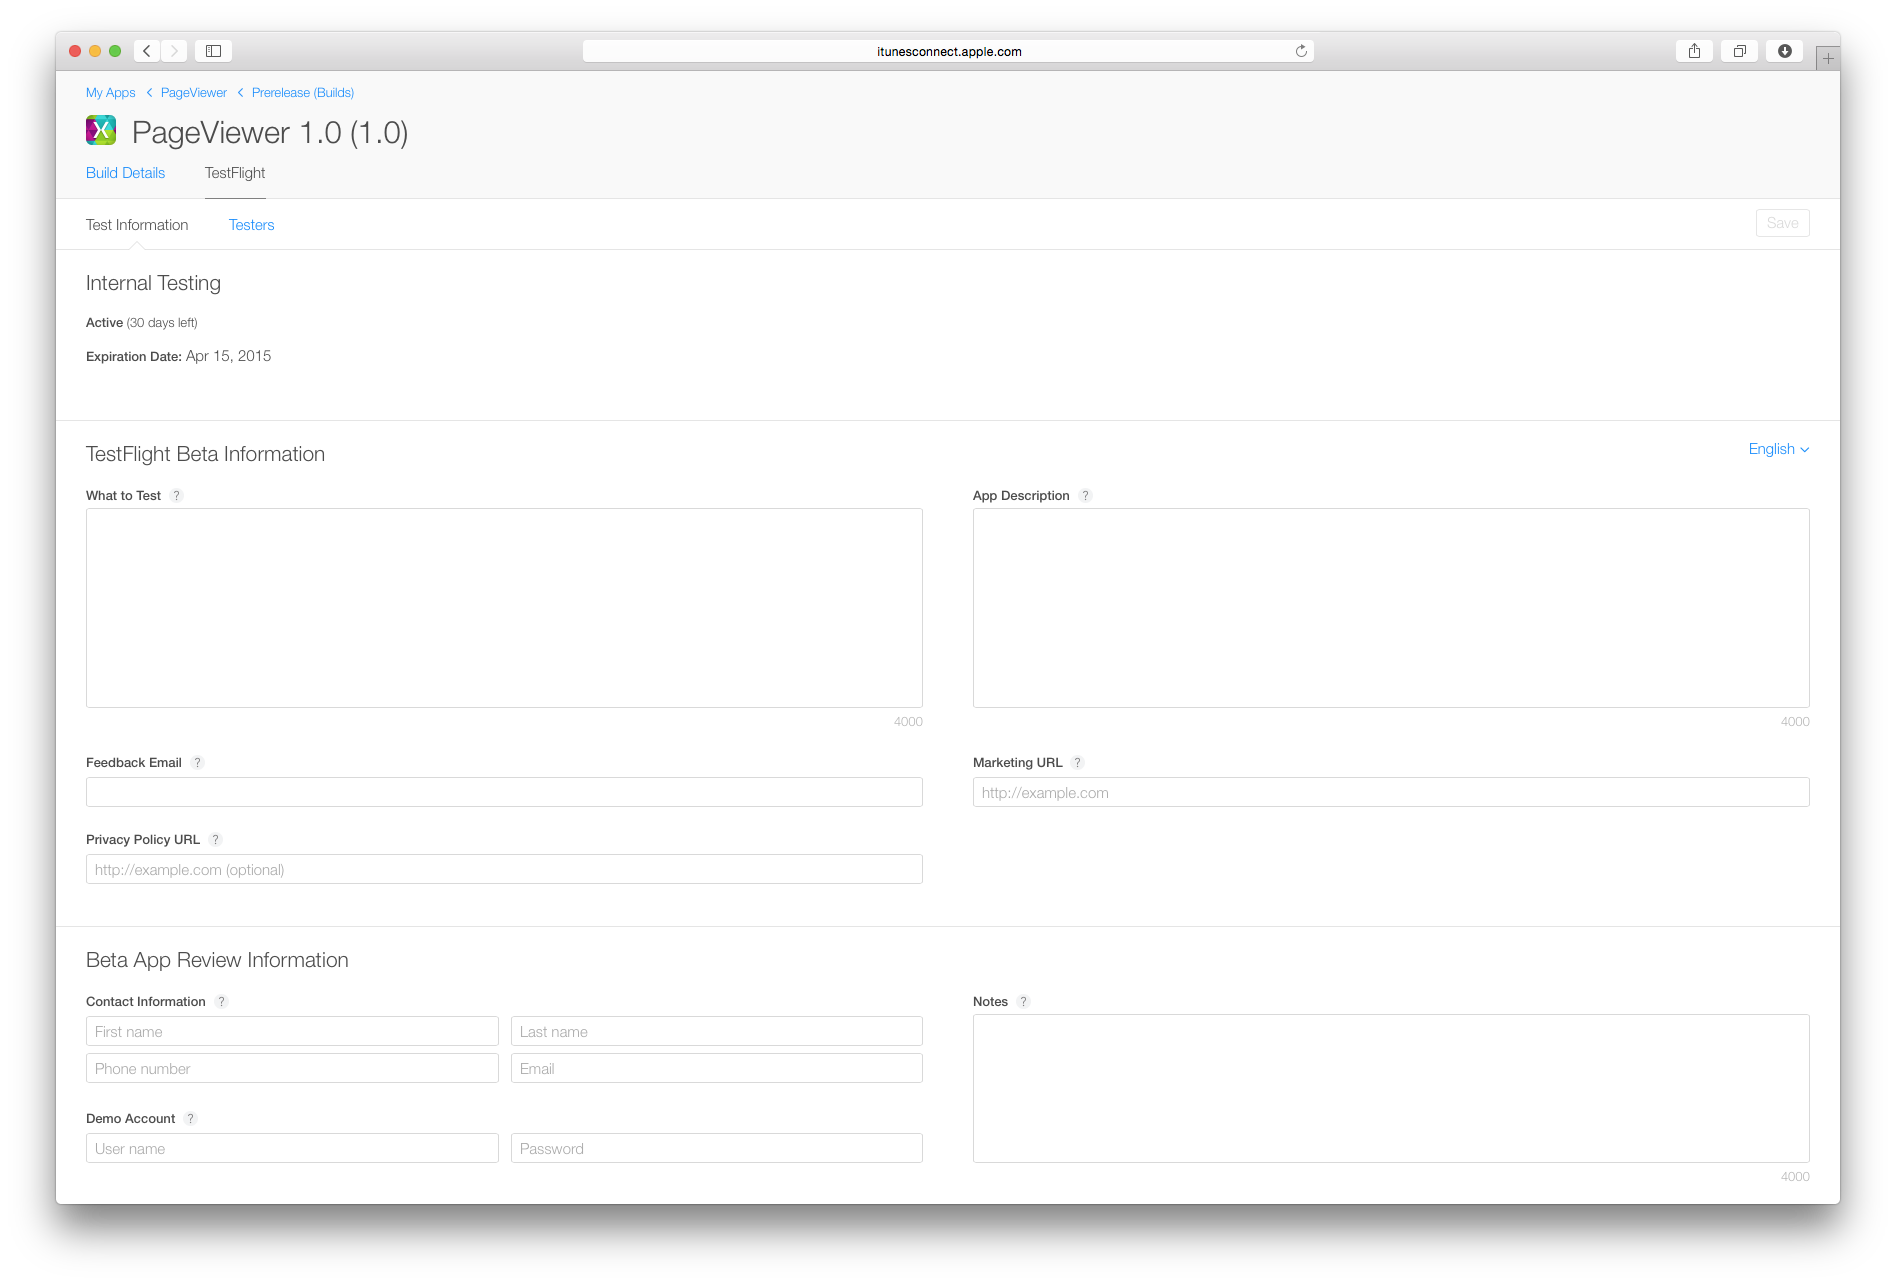
Under Test Information, you tin can provide testers with significant information concerning your app, for instance:
- What to Exam
- Clarification of your App.
- Marketing URL — this volition requite information almost the app y'all are adding.
- Privacy Policy URL — A URL giving information equally to your company's privacy policy.
- Feedback Email.
Notation that this metadata is non required for internal testers, but is required for external testers.
Enable Beta Testing
When you are prepare to commencement testing your app, turn on the TestFlight Beta Testing switch for your version:

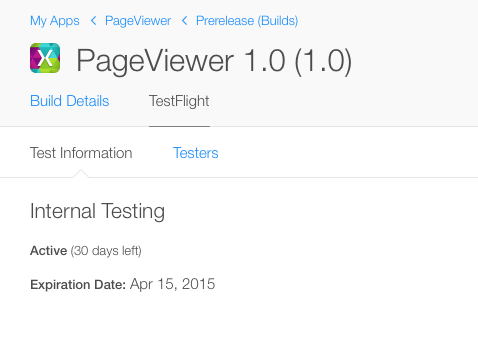
Each build is active for 60 days from the date you turned on the TestFlight Beta Switch. You can see how many days there are left for each build on the Test Data page:
Testing can be turned off at whatever time.
Internal Testers
Internal Testers are members of your development team who accept been assigned i of the following roles in iTunes Connect:
- Admin – An admin is responsible for calculation and managing new users in iTunes Connect.
- Legal – The Squad Amanuensis is the simply admin user that volition be assigned the Legal role. Information technology allows them to sign legal contracts.
- Technical – A technical user can change virtually properties regarding an app. For example, edit app data, upload a binary and send an app for review.
Each build tin can be shared with a maximum of 100 members, who can each examination on upwards to 30 devices.
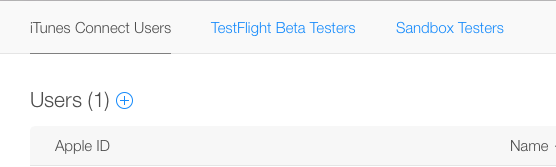
To add testers, browse to Users and Roles on the main iTunes Connect screen:

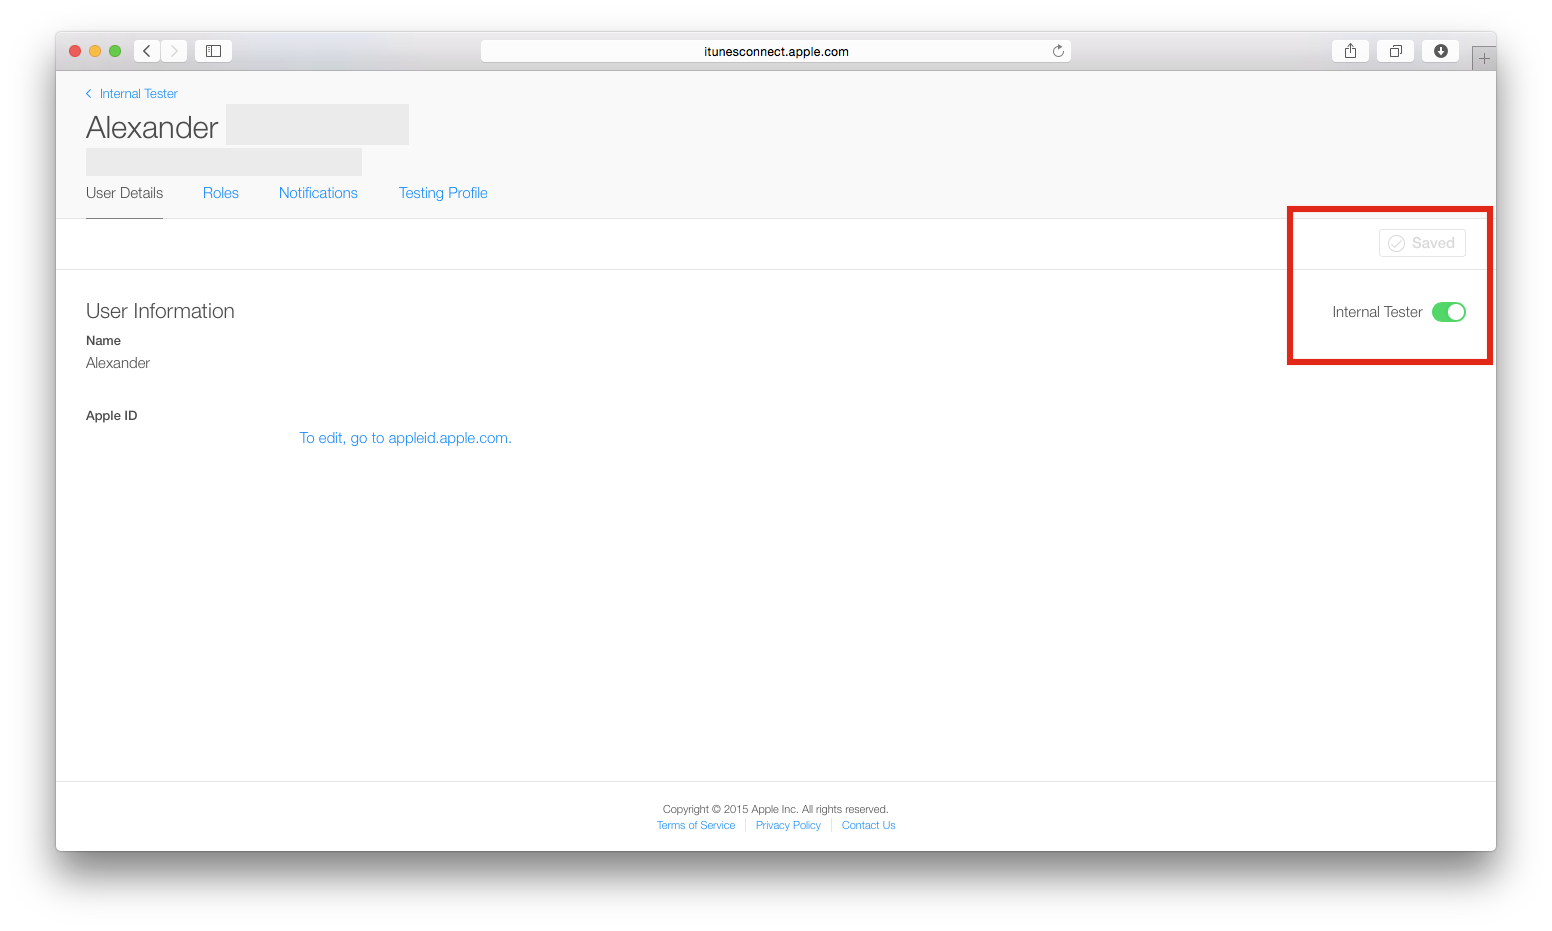
Existing iTunes Connect users will announced in the list. To select them, click on their name, plow on the Internal Tester switch, and click Salvage:
To add a user that is non on the listing, select the + push button adjacent to Users, and provide a First Name, Last Name and email address to create an account. The user will need to confirm their email to activate the account:
If you render to My Apps > Prerelease > Internal Testers, y'all will now encounter the user(s) that have been added for TestFlight Internal beta testing:
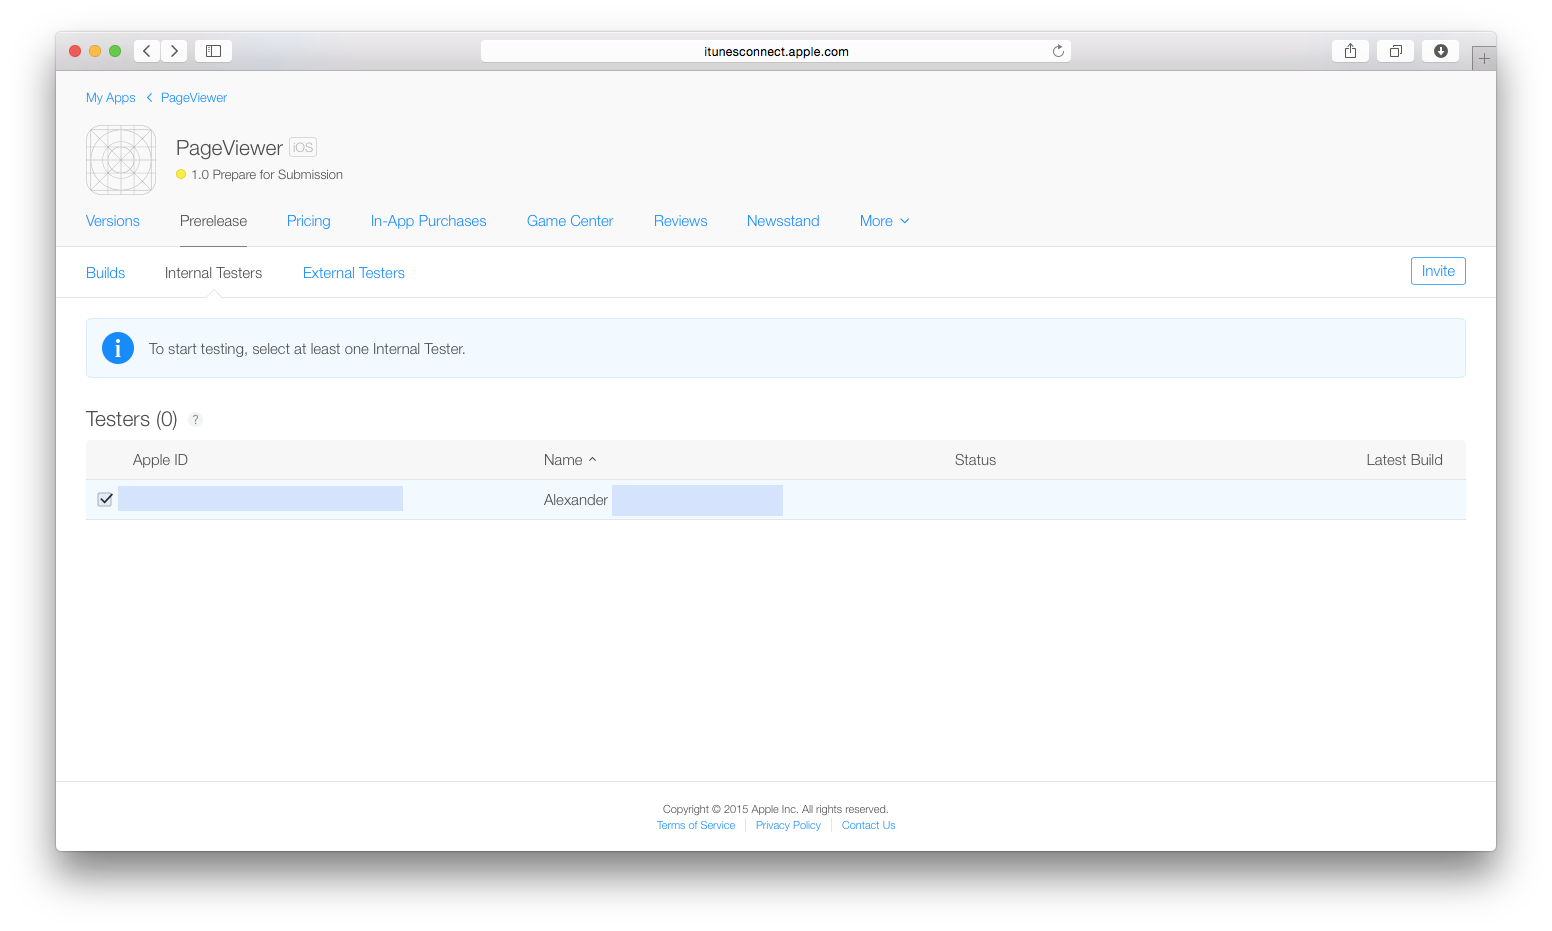
You tin invite these testers by selecting their name and clicking the Invite button. They will receive an electronic mail with an invitation to test your app.
You tin see the condition of their invitation in the condition column of the Internal Testers folio:

External Testers
Before inviting External Testers to beta test your app, it needs to go through a Beta App Review and, therefore, needs to conform to the App Shop review guidelines.
To submit your app for review, click the Submit For Beta App Review text next to your build, as shown in the image below:

For your app to laissez passer the review, you must enter all of the required metadata on the TestFlight Beta Information page.
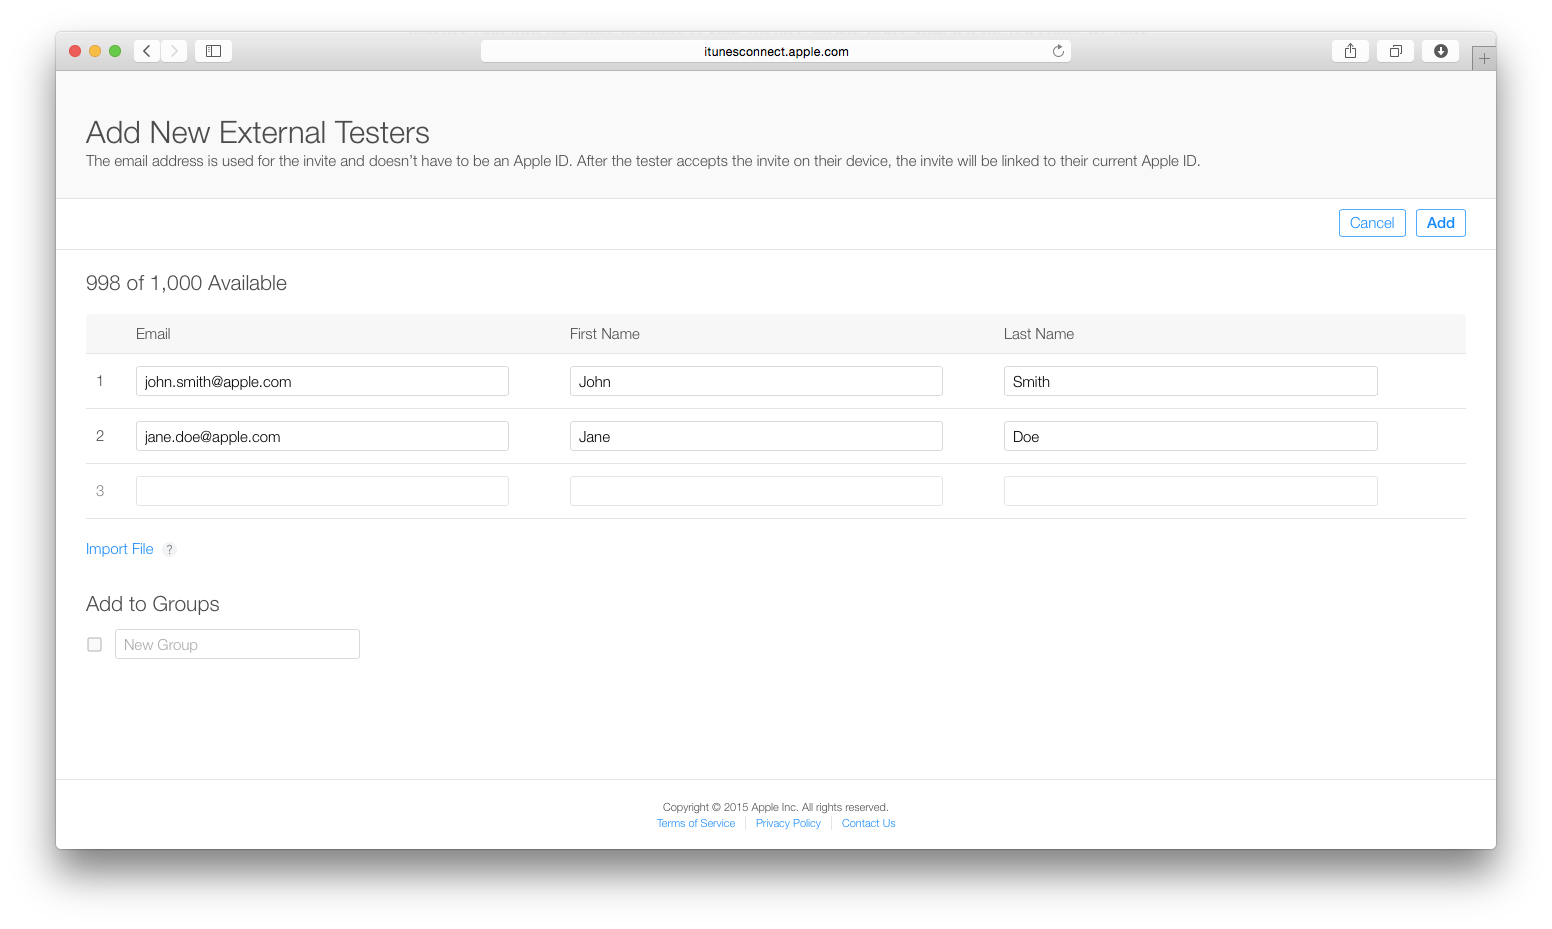
You can at present start to ready invitations and add up to 10000 external testers through the External Testers tab, by entering their electronic mail, Outset Name, and Last Name, every bit illustrated in the screenshot below. The email you lot enter does not have to be their Apple ID; this is but the email they volition receive the invitation on.
If you accept a large number of external testers, you tin utilise the Import File link to import a CSV file with the following format per line:
first name, last name, email address You tin can also add external testers to different groups to assistance proceed your testers organized.
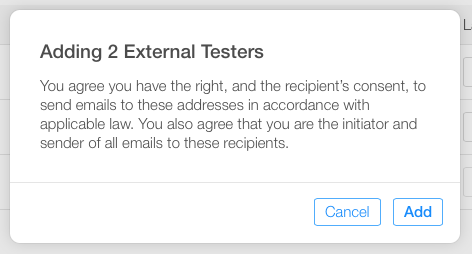
One time y'all have entered the details of the external testers, click Add and confirm you accept the users consent to invite them:
Only after a successful Beta App review will y'all be able to send invitations to external testers. At this point, the text under External on the build page will change to Ship Invites. Click this to send invitations to all the testers you have already added.
If your app has been rejected, yous will need to fix the issues shown in the Resolution Center, and resubmit the entire updated binary for review.
Equally a Beta Tester
Once you invite your tester, they will receive an e-mail like to that in the screenshot below:
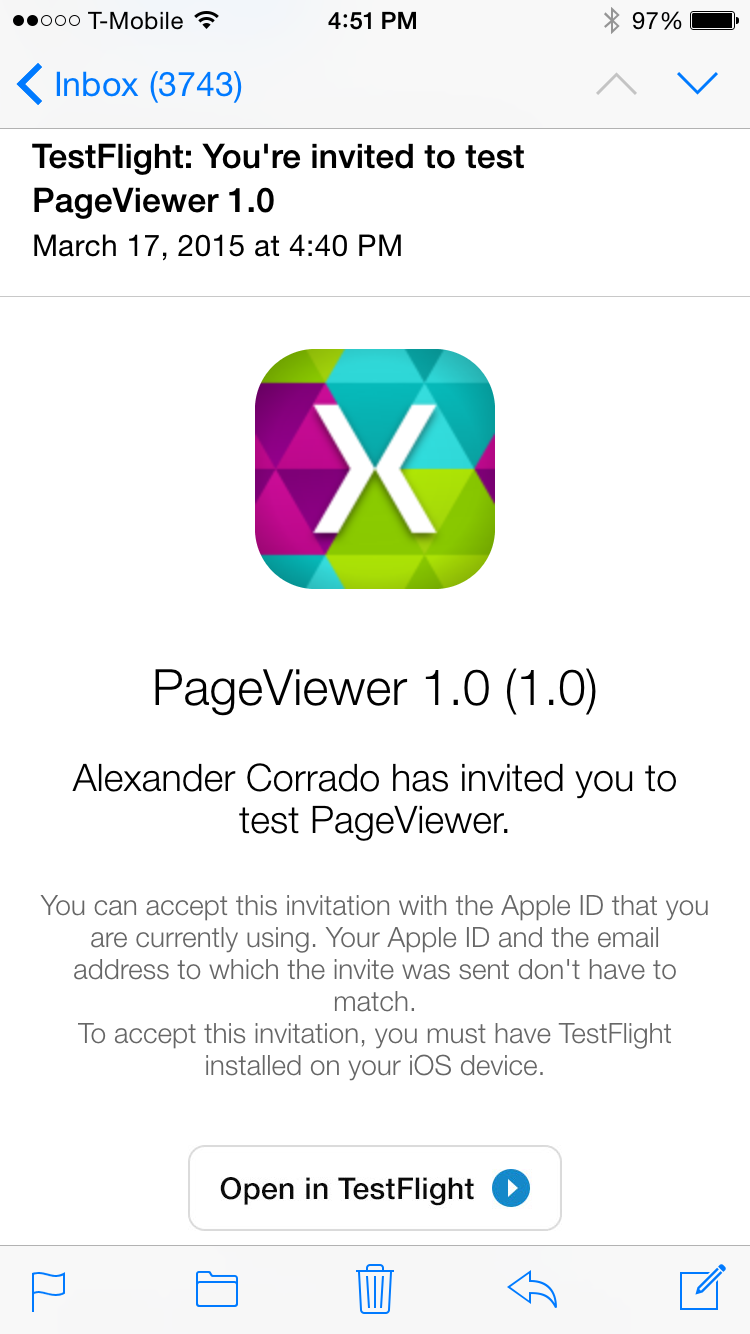
Once they click the Open up in TestFlight button your app will open in the TestFlight application, or if it hasn't already been downloaded, will direct to the App Shop and permit them to download it.
Once your app opens in TestFlight, information technology will show details of what to test for, and will prompt the tester to install your application to their iOS 8.0 (or in a higher place) device:

Test builds will be indicated on the device'southward home screen by an orange dot preceding the awarding name.
Testers can requite feedback through the TestFlight app, and you will relieve this information at the email address provided in the metadata.
Beta Testing Complete
Once beta testing has been completed, y'all tin now submit your app for App Store review by Apple. This process is washed very straightforwardly in iTunes Connect past clicking the Submit for Review button, as illustrated below:

Summary
This article looked at how to use Apple'southward TestFlight Beta Testing through iTunes Connect. It covered how to upload a new build to iTunes Connect, and how to invite internal and external Beta testers to use our app.
- Creating an iTunes Connect Record
- Publishing to the App Store
- Provisioning an App for App Store distribution
- Using the Apple tree TestFlight Beta
Source: https://docs.microsoft.com/en-us/xamarin/ios/deploy-test/testflight
0 Response to "How to Setup and Upload to Testflight"
Post a Comment